In Eclipse IDE, we can use Enhanced Class Decompiler plugin to decompile Java class files without source code directly.
After installing and configuring the Enhanced Class Decompiler plugin, click on the class or methods, press F3, and the plugin will automatically decompile the Java class.
Table of contents
- 1. What is Enhanced Class Decompiler plugin?
- 2. How to install Enhanced Class Decompiler plugin
- 3. How to configure file associations
- 4. How to configure Enhanced Class Decompiler
- 5. Decompile JDK source code
- 6. References
P.S Tested with Enhanced Class Decompiler v3.2.2 and Eclipse IDE 2021-06.
1. What is Enhanced Class Decompiler plugin?
The Enhanced Class Decompiler plugin can choose the following five Java decompiler tools to decompile the Java class without source code.
P.S I choose FernFlower, because the IntelliJ IDEA also using FernFlower to decompile Java class.
2. How to install Enhanced Class Decompiler plugin
Below are the steps to install the Enhanced Class Decompiler plugin in Eclipse IDE.
- Launch Eclipse IDE.
- Click
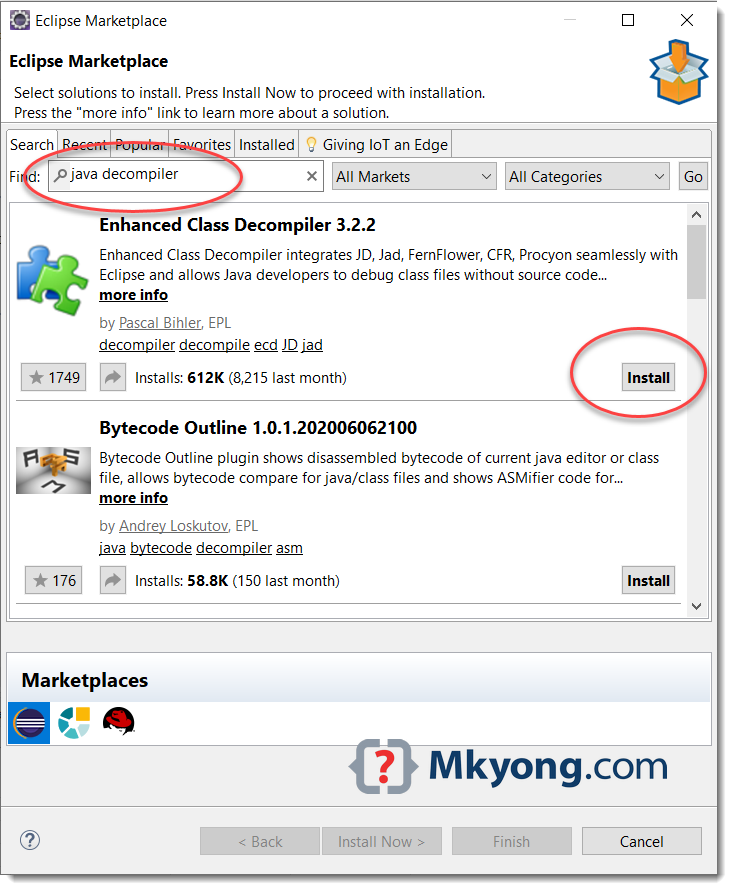
Help -> Eclipse Marketplace.... - Search "Java Decompiler" or "Enhanced Class Decompiler".
- Select the "Enhanced Class Decompiler".
- Click the
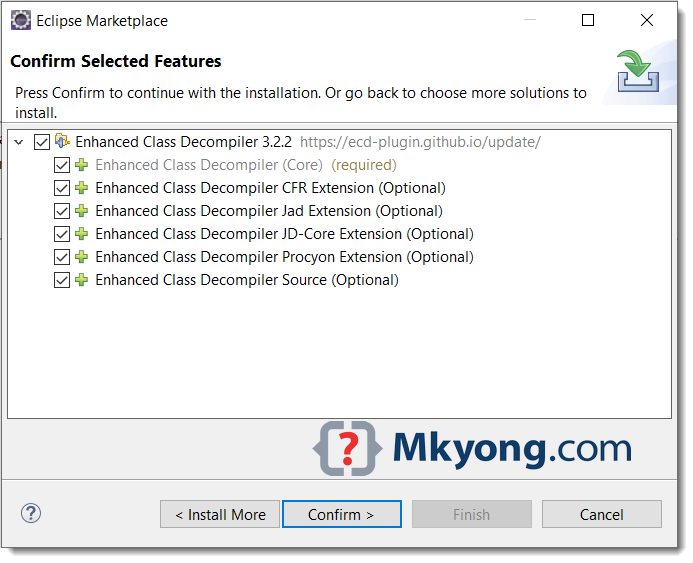
Installbutton. - Select all features and clicks
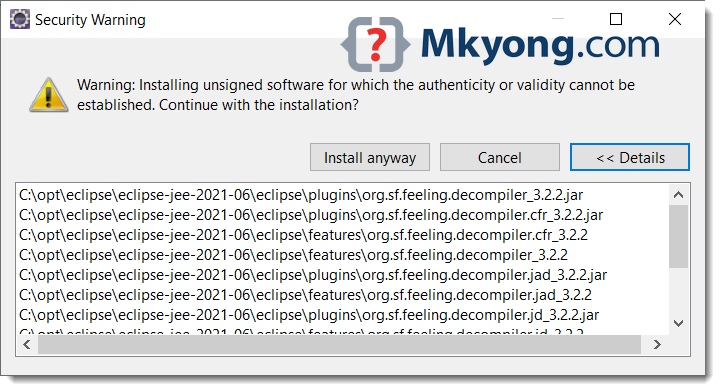
Confirm. - For security warning, clicks
Install anyway. - Done and restart Eclipse IDE.
3. How to configure file associations
Below are the steps to configure the class without source to Class Decompiler Viewer.
- In Eclipse IDE.
- Clicks
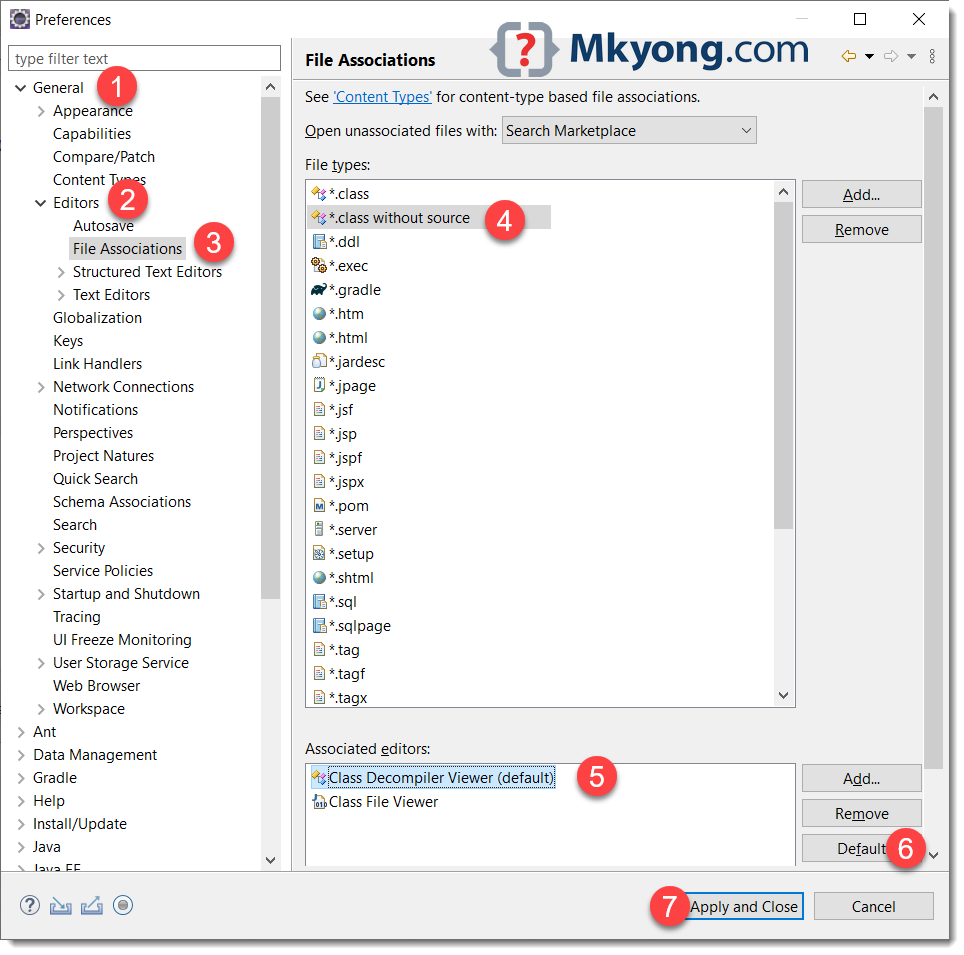
Window -> Preferences -> General -> Editors -> File Associations. - In
File typessection, select*.class without source. - Scroll down to the
Associated editorssection, selectClass Decompiler Viewer, clicksDefaultbutton. If theClass Decompiler Vieweris missing, clicksAddbutton to add a newClass Decompiler Viewer. The key is to make this the default. - Click
Apply and Closebutton.
Done, click on class or method without the source code, press F3, and the plugin will automatically decompile the class files.
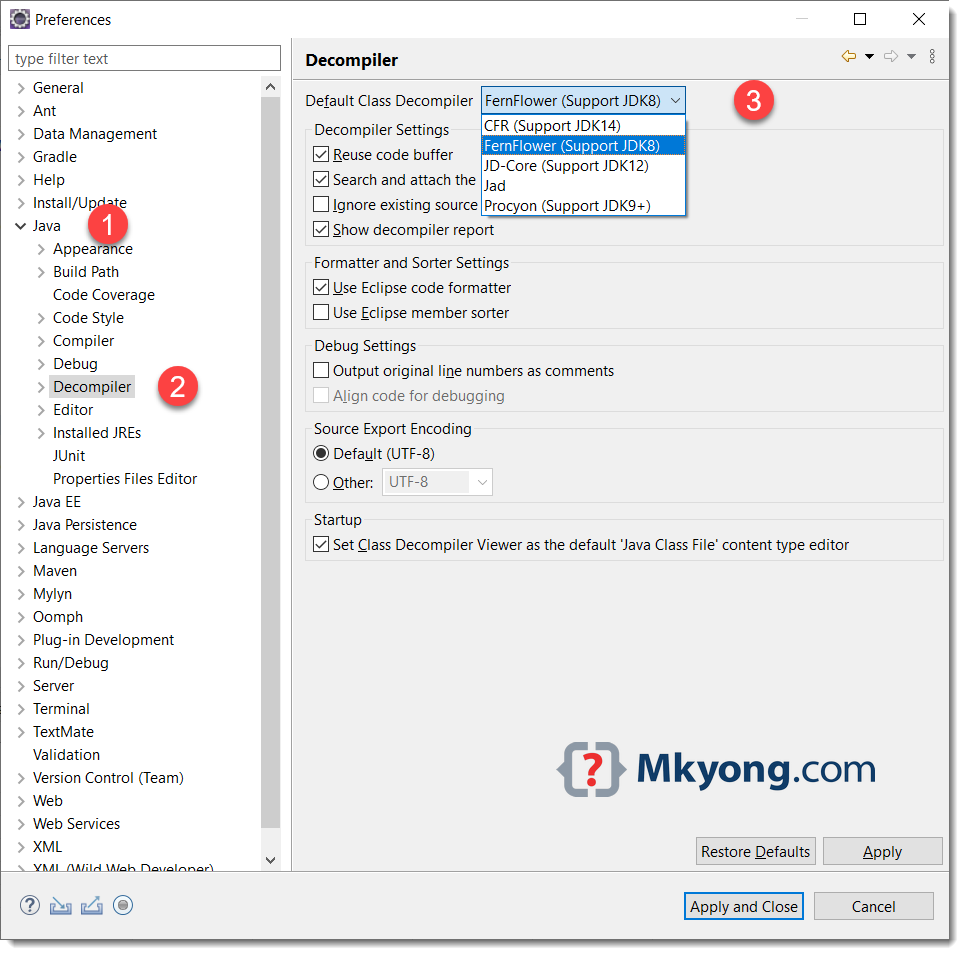
4. How to configure Enhanced Class Decompiler
Click on Window > Preferences > Java > Decompiler to configure which default class decompiler to decompile Java class.
5. Decompile JDK source code
This Enhanced Class Decompiler plugin seems unable to decompile the JDK source code correctly; I’m not sure if I have configured it correctly; it is always a blank page or empty source while I try to decompile the JDK source code (Java 11).
The JDK source code is in the path $JAVA_HOME\lib\src.zip, attach it, and we no need the plugin to decompile it.
# JDK source code
C:\opt\jdk-11.0.1\lib\src.zip
Hey guys!
if you had follow all this steps but still doesnt work you should do this:
– Window
– Preference
– General
– Editors
– File Association
*.class without source
Associated Editors -> Add
search for JadClipse Class File Viewer
Then Press “Default”, then when you press F3 button will open the “.class” source file and decompile it!
regards 🙂
We updated the article again:
Enhanced Class Decompilerplugin to decompile class in Eclipse IDE.class without the source, thanks.Thanks a lot , it worked for me in Helios version
First I will thanks to MKYong for his excellent way of sharing knowledge.
@Diego: Thanks for the tip. Though I did it in the past and I do not remember I need to do the other part that is class file without source. I guess it could be the case in the older version of the eclipse this is happening automatically. Atleast in the current version (Eclipse Kepler) I am using your tip worked for me. Thanks again. 🙂
The real deal is now ECD++ on eclipse marketplace
Thank you
how do you use this with Mac? F3 does not work
Try
fn + F3very useful, simplified, accurate and to the point guide.
Thanks a lot.