Here’s my journey to install “New Relic for PHP” to monitor my WordPress’s blog performance. Below is my server environment :
- Operating system CentOS 6.x 64-bit, VPS with root access
- cPanel 11.x
- Apache version 2.x
- PHP version 5.3.13
- WordPress 3.5.1
P.S The New Relic is a web application performance tool.
First, see how “New Relic for PHP” works :
- The PHP extension module
newrelic.so, in the PHP extension folder. This extension is used to monitor the PHP application. - The
newrelic-daemonaka daemon, acting as a bridge between the PHP application and the New Relic servers, it report data back to the New Relic account.
PHP application <-> Monitoring by newrelic.so --> (data) <-- newrelic-daemon --> New Relic
1. Download PHP Agent
Download the latest agent from the New Relic download site. The download site contains few platforms dependent agents (freebsd, linux, osx, solaris), for my environment, I pick the generic Linux tar file.
#ssh root access to the server
$ ssh mkyong.com -l root
Password:

#Get the agent
$ mkdir /etc/newrelic
$ cd /etc/newrelic/
$ wget http://download.newrelic.com/php_agent/release/newrelic-php5-3.3.5.161-linux.tar.gz

#unzip it
$ tar -xvf newrelic-php5-3.3.5.161-linux.tar.gz

#move all files to shorten path /etc/newrelic/
$ mv newrelic-php5-3.3.5.161-linux/* /etc/newrelic/
2. PHP extension folder
Next, you need to know where is the PHP extension folder. Create a PHP file and put this.
<? phpinfo(); ?>
Visit above PHP file with browser and get the PHP environment :
PHP Extension	20090626
Loaded Configuration File	/usr/local/lib/php.ini
extension_dir	/usr/local/lib/php/extensions/no-debug-non-zts-20090626
P.S Your environment may be vary
CREATE the extension folder (if not exist)- /usr/local/lib/php/extensions/no-debug-non-zts-20090626.
$ mkdir /usr/local/lib/php/extensions/
$ mkdir /usr/local/lib/php/extensions/no-debug-non-zts-20090626
If above PHP extension folder is not exist, the installation (next step) will prompts following error message :
ERROR: computed PHP extension directory:
    /usr/local/lib/php/extensions/no-debug-non-zts-20090626
which is for the PHP installation located at:
    /usr/local/bin
does not exist. This particular instance of PHP will be skipped.
3. Install – newrelic-install
Start to install everything with this command – newrelic-install.
$ pwd
/etc/newrelic
$ ls -lsa
total 26100
    4 drwxr-xr-x    6 root root     4096 May  1 02:10 ./
   16 drwxr-xr-x. 115 root root    16384 May  1 02:58 ../
    4 drwxr-xr-x    4 1010 1011     4096 Apr 25 13:11 agent/
    4 drwxr-xr-x    2 1010 1011     4096 Apr 25 13:11 daemon/
    4 -r--r--r--    1 1010 1011     4088 Apr 25 13:11 LICENSE
    4 -rw-r--r--    1 1010 1011     2153 Apr 25 13:11 MD5SUMS
    8 -r--r--r--    1 root root     7666 May  1 02:18 newrelic.cfg.template
   36 -rwxr-xr-x    1 1010 1011    36063 Apr 25 13:11 newrelic-install*
    4 drwxr-xr-x    2 1010 1011     4096 May  1 01:52 newrelic-php5-3.3.5.161-linux/
26008 -rw-r--r--    1 root root 26597254 Apr 25 17:07 newrelic-php5-3.3.5.161-linux.tar.gz
    4 -r--r--r--    1 1010 1011      297 Apr 25 13:11 README
    4 drwxr-xr-x    2 1010 1011     4096 Apr 25 13:11 scripts/

$ ./newrelic-install
Here’s the interactive mode
New Relic PHP Agent Installation (interactive mode)
===================================================

    Please select from one of the following options:

    1)  Install New Relic Agent and Daemon
    2)  Uninstall New Relic Agent and Daemon

    0)  Exit

   Enter choice (1-2, 0 to exit): [YOUR INPUT]
Get license key from your new relic account settings.
New Relic PHP Agent Installation (interactive mode)
===================================================


In order for the New Relic agent to function correctly it requires a license
key. Please enter that key now. If you do not have your license key handy you
can add it to your INI file(s) later. Please be aware that the license key you
specify here will be installed in the default INI files, and will be the key
used for any virtual host or directory / application that does not over-ride
the key on a per-host or per-directory basis. This is only relevant if you run
a multi-tenant site. Please contact [email protected] if you run such a
site and have any questions.

If you are upgrading from a previous version please leave this blank. Please
also note that the key you enter here will not replace any existing key in
your INI file(s). It applies only to newly created INI files or INI files that
have not been modified by this script before.

   Enter New Relic license key (or leave blank): [YOUR INPUT]

Below is a list of the directories in which we found a copy of PHP. Please
select the directory or directories for which you wish to install New Relic.
You can select either a single directory or multiple directories by separating
each choice with either a space or a comma. To select all of the directories
shown, please enter the special keyword 'all' (without the quotes).

   1)   /usr/local/bin
   2)   /usr/bin
   3)   /usr/local/bin

   0)   Exit

   Selection (1-3, 0 to exit or all): [YOUR INPUT]

Found a valid PHP in : /usr/local/bin
         PHP Version : 5.3.13
  Module API version : 20090626
    Module directory : /usr/local/lib/php/extensions/no-debug-non-zts-20090626
  Zend Thread Safety : no
        CLI ini file : /usr/local/lib/php.ini
      Install Status : OK


Agent installation complete. The following php.ini files need to be modified by
hand to load the New Relic extension, enable it, and configure it. A sample
ini file fragment can be found at:

    /etc/newrelic/scripts/newrelic.ini.template

Without performing this step the agent will not be loaded correctly. The ini
file(s) you need to modify are:
    /usr/local/lib/php.ini

The agents need the New Relic proxy daemon to be installed and running. Without
this daemon no data will be transmitted to the New Relic web site. It is highly
recommended that you allow this script to install the daemon into the default
location, which is:

    /usr/bin/newrelic-daemon


If you do not have permission to install the daemon to this directory (you
need to be root to have permission) then please select no at the prompt
below. Also please note that as of version 3.0 of the New Relic PHP agent
this daemon does not need to be started automatically by the system. The
daemon is configured from, and started by, the agent. Please refer to the
New Relic for PHP documentation for details.

   Install daemon ([y]es, [n]o or x to e[x]it): [YOUR INPUT]

New Relic is now installed on your system. Congratulations!

The last step before you will start seeing data in your account is to restart
your web server or servers, or whatever environment hosts the PHP you wish to
monitor. For example, you may need to restart Apache or nginx, or if you are
using php-fpm and FastCGI, you will need to restart php-fpm. If you installed
New Relic into multiple locations you may have multiple PHP hosts to restart.
If everything is working properly you should see the following two log files:

    /var/log/newrelic/newrelic-daemon.log
    /var/log/newrelic/php_agent.log

Now you should create a simple test php script that contains the line:

   <?php phpinfo(); ?>

and point your browser at the test script, and you should see the New Relic
extension and its settings. If you still do not see those log files or data in
your account please contact our support staff at [email protected] and be
sure to include the following file in your bug report:

    /tmp/nrinstall-20130501-020840-24175.tar

Thank you for choosing New Relic!
Done.
4. About newrelic-install
The script newrelic-install help you to configure everything :
1. It copied newrelic.so to PHP extension folder.
$ ls -lsa /usr/local/lib/php/extensions/no-debug-non-zts-20090626

4 drwxr-xr-x 2 root root 4096 May  1 02:17 ./
4 drwxr-xr-x 3 root root 4096 May  1 02:15 ../
0 lrwxrwxrwx 1 root root   44 May  1 02:17 newrelic.so -> /etc/newrelic/agent/x64/newrelic-20090626.so*
2. It merged php.ini with /etc/newrelic/scripts/newrelic.ini.template, and configure the value.
$ cat /usr/local/lib/php.ini
;.......
;existing php configuration

;template from newrelic.ini.template
extension=newrelic.so

[newrelic]
;
; Setting: newrelic.license
; Type   : string
; Scope  : per-directory
; Default: none
; Info   : Sets the New Relic license key to use. This can vary from directory
;          to directory if you are running a multi-tenant system. By special
;          dispensation if you upgraded from a previous version of the agent
;          where the license key was set in the daemon, the installation and
;          upgrade script will have preserved your license key from the file
;          /etc/newrelic/newrelic.cfg, but ONLY if you installed via rpm/yum
;          or dpkg. The key is saved in /etc/newrelic/upgrade_please.key
;          and the agent will look for that file if you do not specify a valid
;          license here.
;          It is *STRONGLY* recommended that you set the license key in your
;          INI file(s) and do not rely on the key file being present. Also
;          please note that even if you are not letting the agent start the
;          daemon and are still using newrelic.cfg (see below) the license
;          keyword in that file is no longer obeyed. Instead the agent will
;          use the preserved value of that license from the key file.
;          Once you have updated your INI files to contain the license we
;          urge you to remove /etc/newrelic/upgrade_please.key in order to
;          eliminate the potential for confusion about exactly where the key
;          is coming from.
;
newrelic.license = "aaaaaaabbbbbbbccccccc1234"

; Setting: newrelic.daemon.location
; Type   : string
; Scope  : system
; Default: /usr/bin/newrelic-daemon
; Info   : Sets the name of the daemon executable to launch.
;          Please note that on OpenSolaris where /usr is frequently a read-only
;          filesystem, the default daemon location is
;          /opt/newrelic/bin/newrelic-daemon.
;
;newrelic.daemon.location = "/usr/bin/newrelic-daemon"
3. It copied newrelic-daemon to few locations :
$ find / -name newrelic-daemon
/etc/sysconfig/newrelic-daemon
/etc/rc.d/init.d/newrelic-daemon
/etc/logrotate.d/newrelic-daemon
/usr/bin/newrelic-daemon
The daemon will be started automatically, and managed via php.ini. Refer to this daemon startup guide.
5. Start Daemon
Restart Apache via WHM or command.
$ service httpd restart
The daemon should be started automatically, if not, issue command newrelic-daemon to start it manually.
$ newrelic-daemon
$ ps -ef | grep newrelic-daemon
root     30912     1  0 02:37 ?        00:00:00 newrelic-daemon
root     30915 30912  0 02:37 ?        00:00:00 newrelic-daemon
root     30940 19839  0 02:37 pts/0    00:00:00 grep --color newrelic-daemon
Two daemon’s processes are correct, this is how new relic design it. Read this New Relic Daemon Processes.
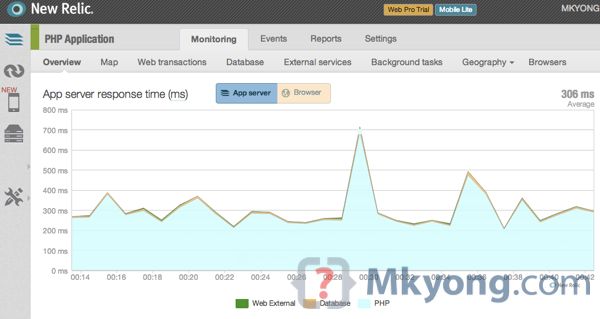
Done.
Hi Mkyong
Nice tutorial for PHP guys. Is is possible for us to add new relic for static web sites which servers only HTML pages hosted in apache server.
One more request we really awaiting your tutorial on Angular JS 🙂
Elango