Android ImageButton selector example
In last Android tutorial, you use “ImageButton” to display a “Button” with a customized background image easily. However, you can do more than that just a simple image, Android allow you to change the button’s image depends on different states like button is focused or button is pressed.
This example is referenced from this Android custom button article, with minor changes.
P.S This project is developed in Eclipse 3.7, and tested with Android 2.3.3.
1. Add Images to Resources
Prepare 3 images for button states, and put it into “resource/drawable” folder.
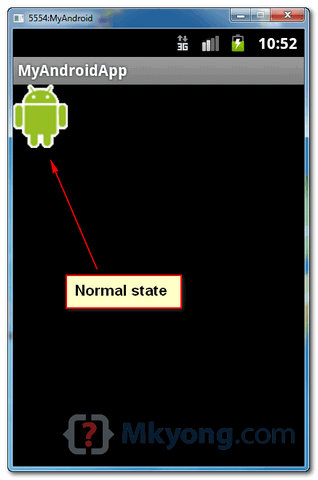
- button_normal_green.png – Default image button.
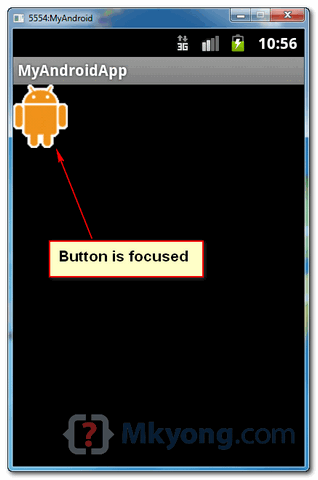
- button_focused_orange.png – Display when button is focused, for example, when phone’s keypad is move (focus) on this button.
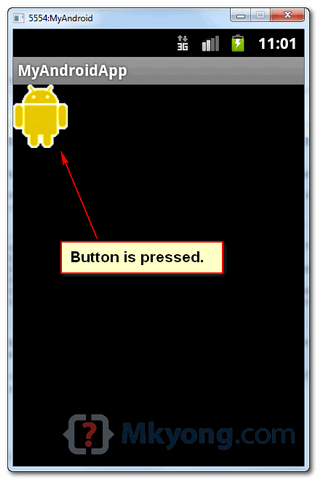
- button_pressed_yellow.png – Display when button is pressed.
2. Add Selector for different button states
Now, create a new XML file in “res/drawable/” folder, in whatever name you want, in this case, we just give a name as “new_button.xml“. This file defined which button state is belong to which image.
Now, you can refer to this button via this Id : @drawable/new_button.
File : res/drawable/new_button.xml
<?xml version="1.0" encoding="utf-8"?>
<selector xmlns:android="http://schemas.android.com/apk/res/android">
    <item android:drawable="@drawable/button_pressed_yellow"
          android:state_pressed="true" />
    <item android:drawable="@drawable/button_focused_orange"
          android:state_focused="true" />
    <item android:drawable="@drawable/button_normal_green" />
</selector>
3. Add Button
Open “res/layout/main.xml” file, add a normal button, and attach the background image to above “new_button” via “android:background="@drawable/new_button”
File : res/layout/main.xml
<?xml version="1.0" encoding="utf-8"?>
<LinearLayout xmlns:android="http://schemas.android.com/apk/res/android"
    android:layout_width="fill_parent"
    android:layout_height="fill_parent"
    android:orientation="vertical" >

    <Button
        android:id="@+id/imageButtonSelector"
        android:layout_width="wrap_content"
        android:layout_height="wrap_content"
        android:background="@drawable/new_button" />

</LinearLayout>
4. Code Code
A normal button with a simple click listener.
File : MyAndroidAppActivity.java
package com.mkyong.android;

import android.app.Activity;
import android.os.Bundle;
import android.widget.Button;
import android.widget.Toast;
import android.view.View;
import android.view.View.OnClickListener;

public class MyAndroidAppActivity extends Activity {

	Button imageButton;

	@Override
	public void onCreate(Bundle savedInstanceState) {
		super.onCreate(savedInstanceState);
		setContentView(R.layout.main);

		addListenerOnButton();

	}

	public void addListenerOnButton() {

		imageButton = (Button) findViewById(R.id.imageButtonSelector);

		imageButton.setOnClickListener(new OnClickListener() {

			@Override
			public void onClick(View arg0) {

				Toast.makeText(MyAndroidAppActivity.this,
					"ImageButton (selector) is clicked!",
					Toast.LENGTH_SHORT).show();

			}

		});

	}

}
5. Demo
Run the application.
1. Result, default button. (button_normal_green.png)

2. Button is focused. (button_focused_orange.png)

3. Button is pressed. (button_pressed_yellow.png)

thanks a lot
This tutorial still can be use. AWESOME !!
Thanks for explaining this so well, It really helps me in understanding basic android concepts of xml.
thanks!
Thanks for sharing this is Really helped me, ur explanation is very clear and u added the downloadable file thats add the advantage to rectify errors more accurately 🙂 Good Work Keep Going
Nice, but I have a question about it.
I would like to have a kind of state on this image button.
I now have a toggle button like this.
private OnClickListener powerButtonListener = new OnClickListener() {
public void onClick(View arg0) {
ToggleButton powerButton = (ToggleButton) arg0;
if (D) Log.d(TAG, “powerButtonListener” + powerButton.isChecked());
searchAndConnect();
if (powerButton.isChecked()) {
powerOn = 1;
sendColorToArm();
} else {
powerOn = 0;
sendColorToArm();
if (mBTSerialService != null) mBTSerialService.stop();
}
}
};
(My image’s are in a xml file called on_btnaction.xml)
in mainActivity.java.
public class mainActivity extends Activity {
ImageButton on_btnaction;
@Override
public void onCreate(Bundle savedInstanceState) {
on_btnaction = (ImageButton) findViewById(R.id.on_btnaction);
on_btnaction.setOnClickListener(on_btnactionListener);
}
private OnClickListener on_btnactionListener = new OnClickListener() {
public void onClick(View arg0) {
ImageButton on_btnaction = (ImageButton) arg0;
if (D) Log.d(TAG, “on_btnactionListener” + on_btnaction.getDrawableState());
searchAndConnect();
if (on_btnaction.getDrawableState(1)){
powerOn = 1;
sendColorToArm();
} else {
powerOn = 0;
sendColorToArm();
if (mBTSerialService != null) mBTSerialService.stop();
}
}
};
Well, what do you think and what do I have to do to make the ImageButon like the ToggleButton?
Thanks in advance.
Thank you!!! It was so useful and well explained.
please help me button android app
Hi mkyong, How to code more than one Rollover button in one code,do you know it?
where is the coding for quick contact badge?
Hello, great tutorial. But what if I’m using imageview? Is the coding still the same?
state_focuse is not working even i download ur project run it’s also
Gud one tutorials really very helpfull……………:)
My app has a lot of buttons with images. Is there a way to recolor the “normal” bitmap (and preserve the transparency) to make a “selected” bitmap. Ive seen examples where the background is changed, but that only results in a big colored rectangle overlaying the image. It would be nice to do it on-the-fly so a “selected” icon would not need to be created ahead of time. Especially in the case where there are a lot of image buttons.
Good explanation
Hello! I’m just getting started developing on the Android platform and your examples and such on this site are fantastic primers for me !
I’ve been working with Mozilla on Fennec, our Firefox version for mobile and decided it was time to do some native JAVA / app coding and this has been tremendously helpful getting me going.
fyi – I’m developing with intelliJ… It’s a fast, stable platform and all your examples work fantastic while using it.
Thanks you so much!
Thx for the tutorial but i’ve got error on the part which say
@Override
public void onClick(View argO) {
// eclipse ask me to remove @Override
It works well only if You have fixed proportions of your button size. when You would try to scale button as its height would be twice as big as it is now – Your image will be streched 🙂
I have no idea how to do it well… still searching
Very Nice tutorials it is very helpful for beginners.
Thanks for that piece of information. I am calling rest service on pressing the button. But the problem is button color is changing after the rest call is finished(even though i am running the service on background thread using Runnable). Can it be possible to change the color instantly and after that perform the rest call.
Many Thanks,
vijay
So do you need to create a seperate xml for each button you are going to create like this?
Thanks for share this…its really helpful for fresher android developer…
good